I Built a Flight Simulator for My Final Year Project! - Part 1

This is the story about how I developed the control software for a flight motion platform. In essence it's a flight simulation rig that uses a innovate platform singlehandedly developed by the university which eventually led to a very fun epilogue.

Hero image for I Built a Flight Simulator for My Final Year Project! - Part 1
Final Year Project Report Here's my final project report I did for my robotics degree!. 138471_Omar_Maaouane_Veiga_Final_Year_Project_Report_3178027_1481399707.pdf
Final Year Presentation Slides Here's my final project slides I showed for my final year project!. Technical Presentation.pptx

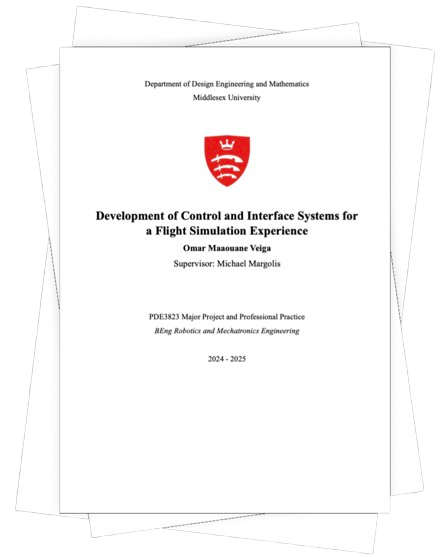
Back in January 2025 I was about to start my final year project. This was a 12 week project that would punctuate my 3 year Robotics and Mechatronics Undergraduate degree at Middlesex University. It was a very important project and naturally I felt very nervous.

Little did I know that the project I would undertake would take me on a 3 month journey alongside another 3 month unforgetable epilogue (subtle foreshadowing for part 2).

This is the story of how it all came together.

In the very beginning I chose my project to be about developing a physical platform that could move the user according to the motions shown in a flight simulator. It would be a rig similar to one of those 4D rides you’d find in theme parks such as Disneyland or Universal Studios.

I already had an interest in aviation since I was little and I also developed my very own flight simulator game called Crusty’s flight simulator.

Moreover, the university already had a convenient rig that could move the user in all 6 degrees of freedom as shown by the picture on the left. This was a very novel platform the university developed to use as a rollercoaster simulator. What sets it apart is it’s use of fluidic muscles to move the player around.

Those were the pieces. The university’s rig connected to my simulator which would result in an awesome ride that was never made before.

As shown to on the picture to the right, the rough aim of the ride was to be an immersive and accesible experience to all users.

This was not the final idea. When I reached my supervisor about the project he suggested several changes to the project such as:

  • Developing the software in mind with the RAes’s platform which also offered access for wheelchair bound users.
  • Using a projector instead of VR for visual cues.
  • Using X-Plane 11 as the simulator because it has more realistic plane models and physics on top of an aerospace grade support for telemetry communications between devices.

Through those changes, my project could also contribute to another exisisting project the university had with the Royal Aeronautics Society, Boeing and Coventry University (even more subtle foreshadowing for part 2).

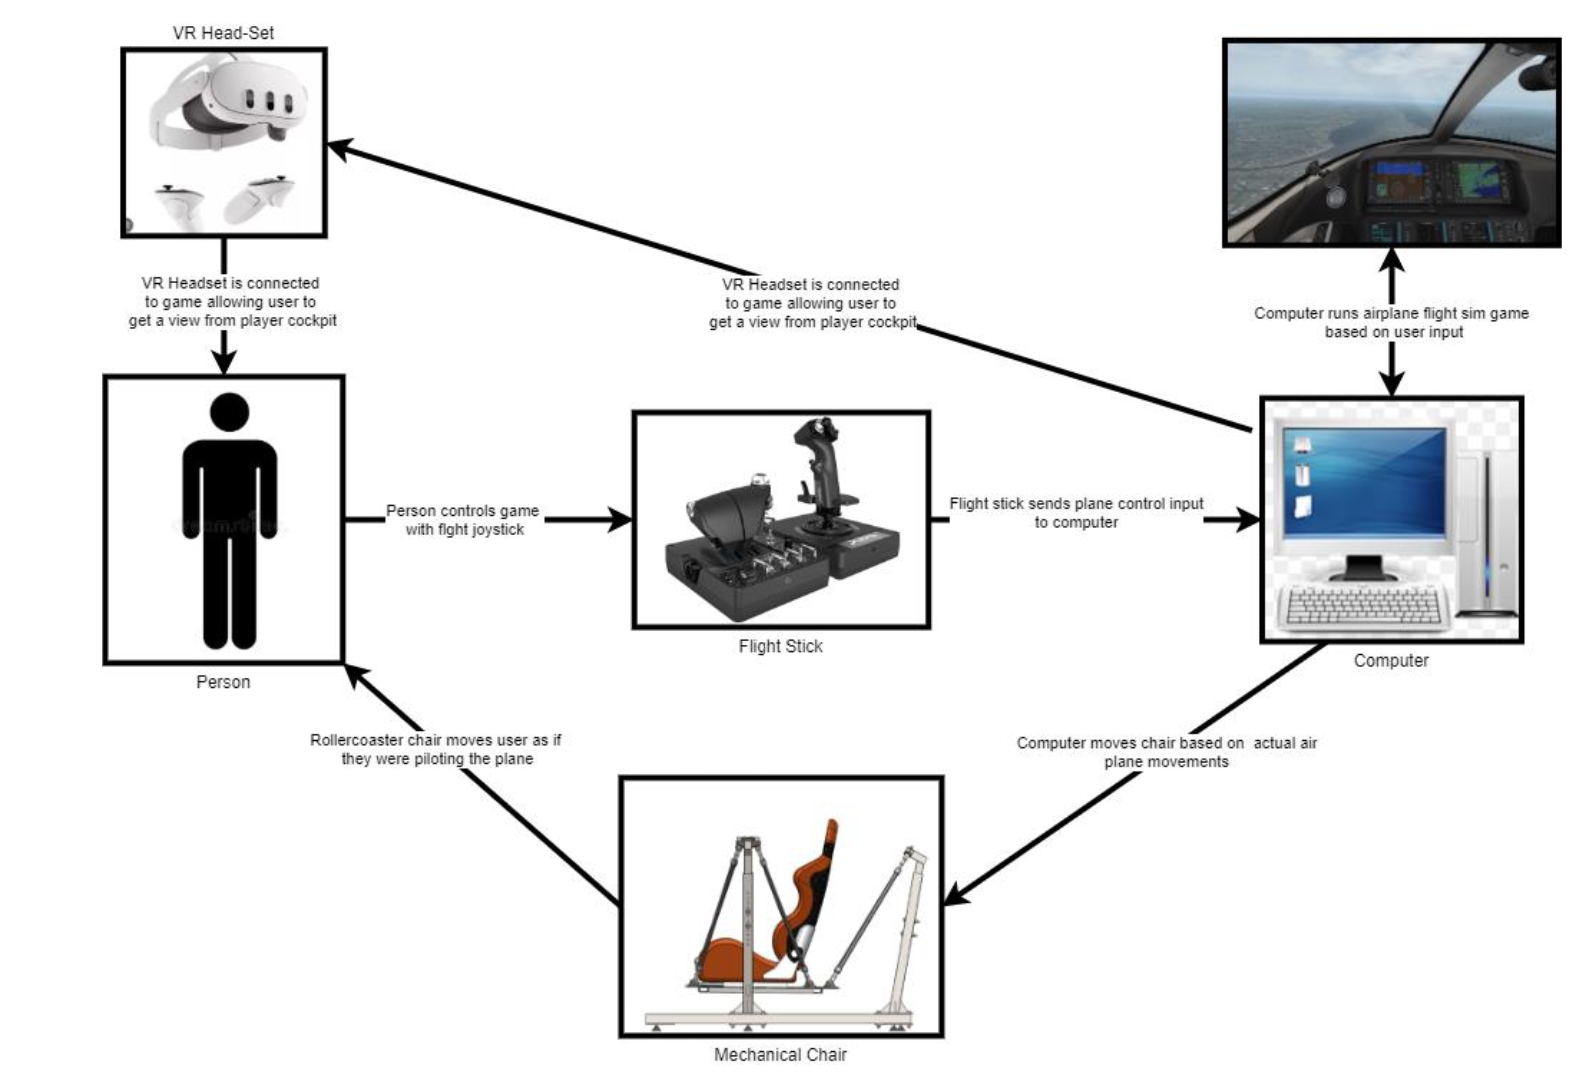
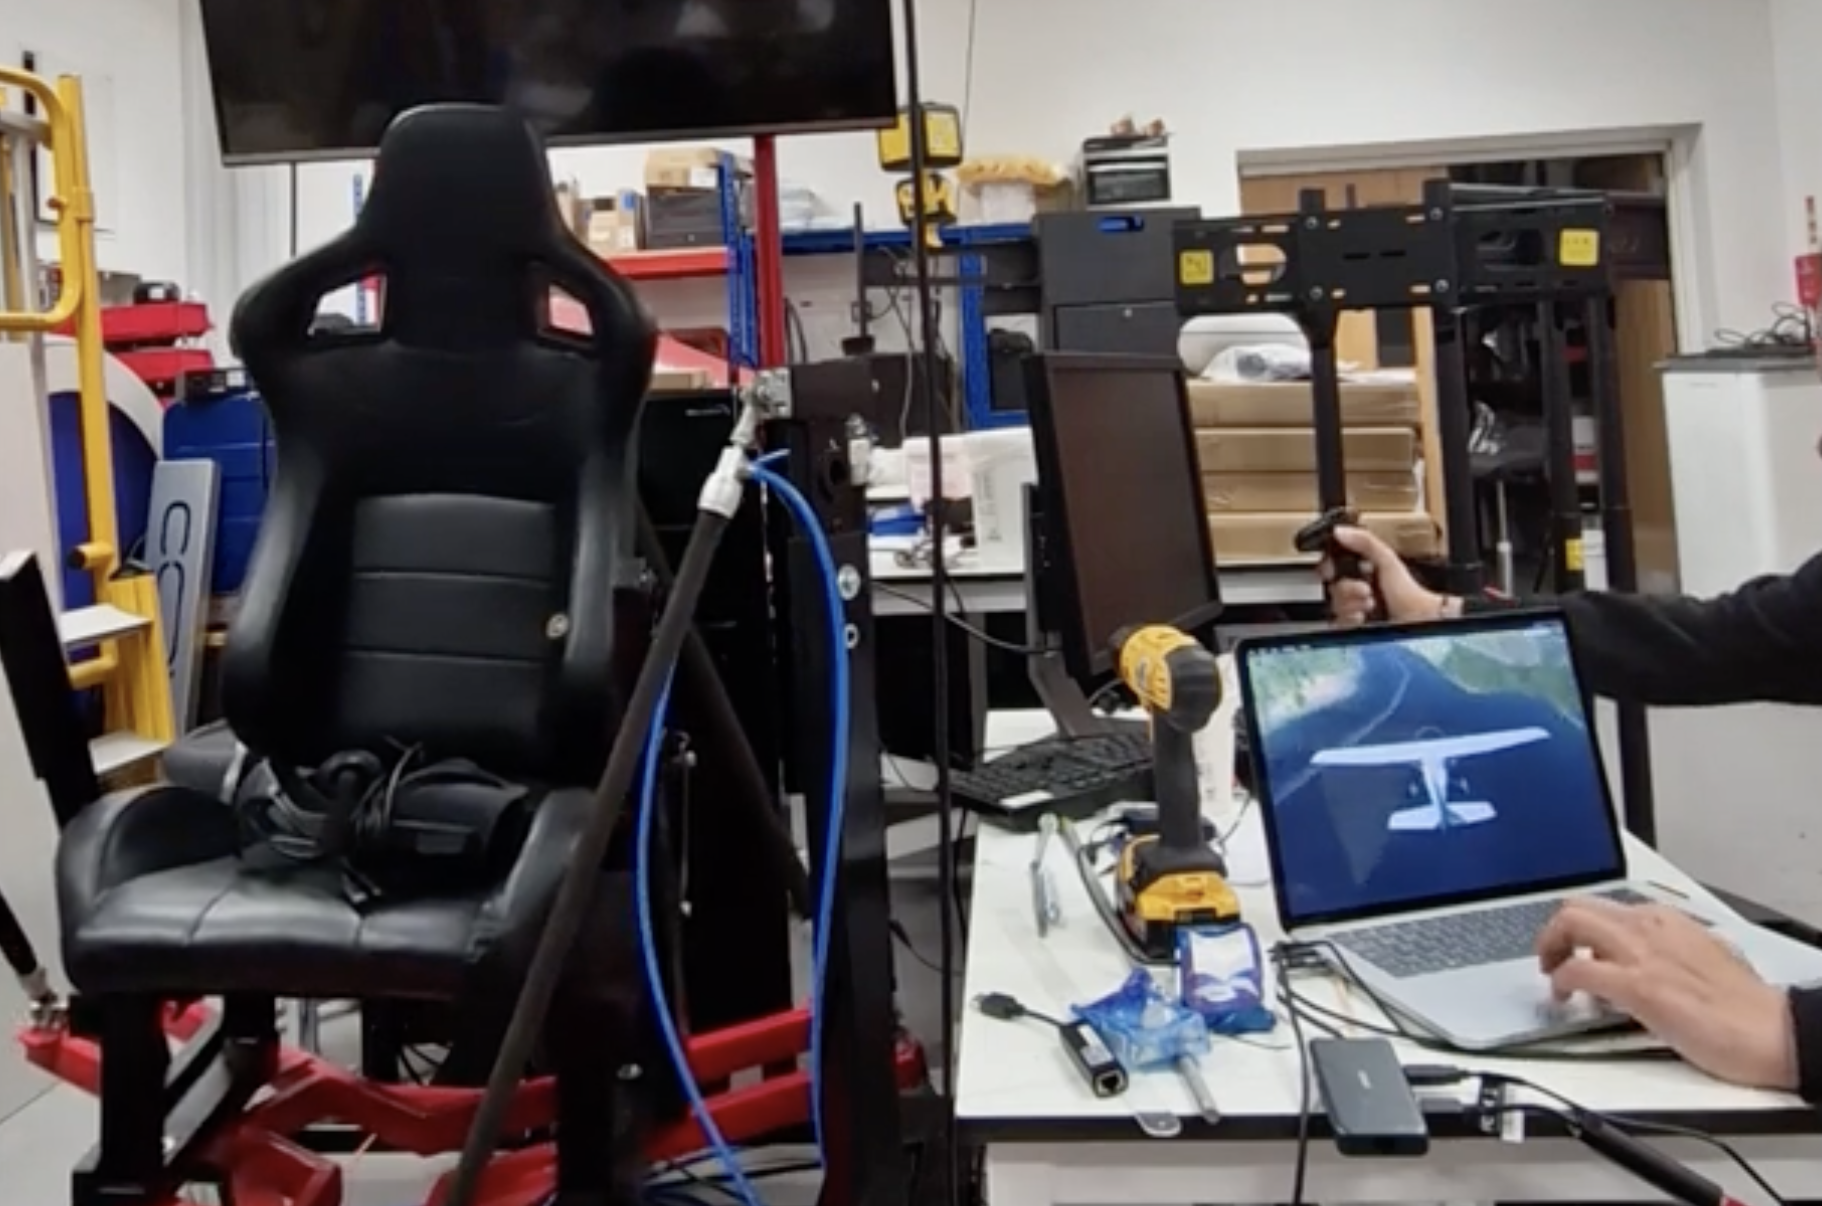
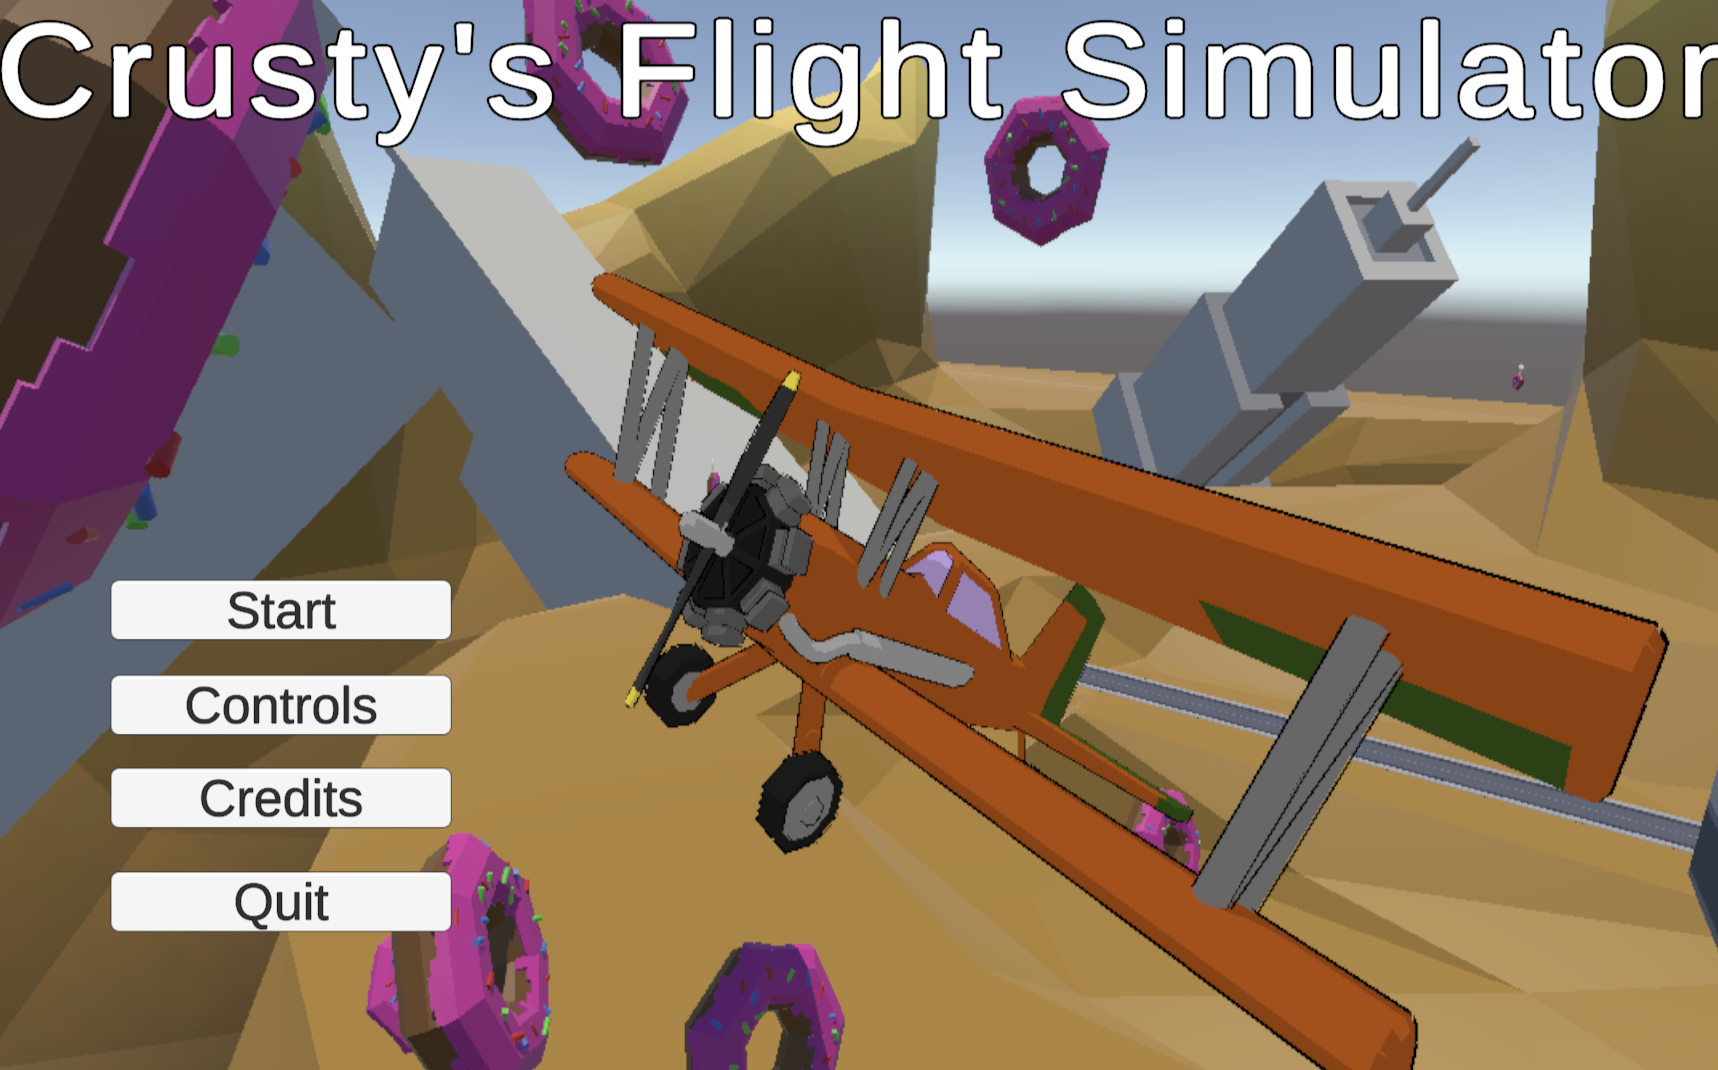
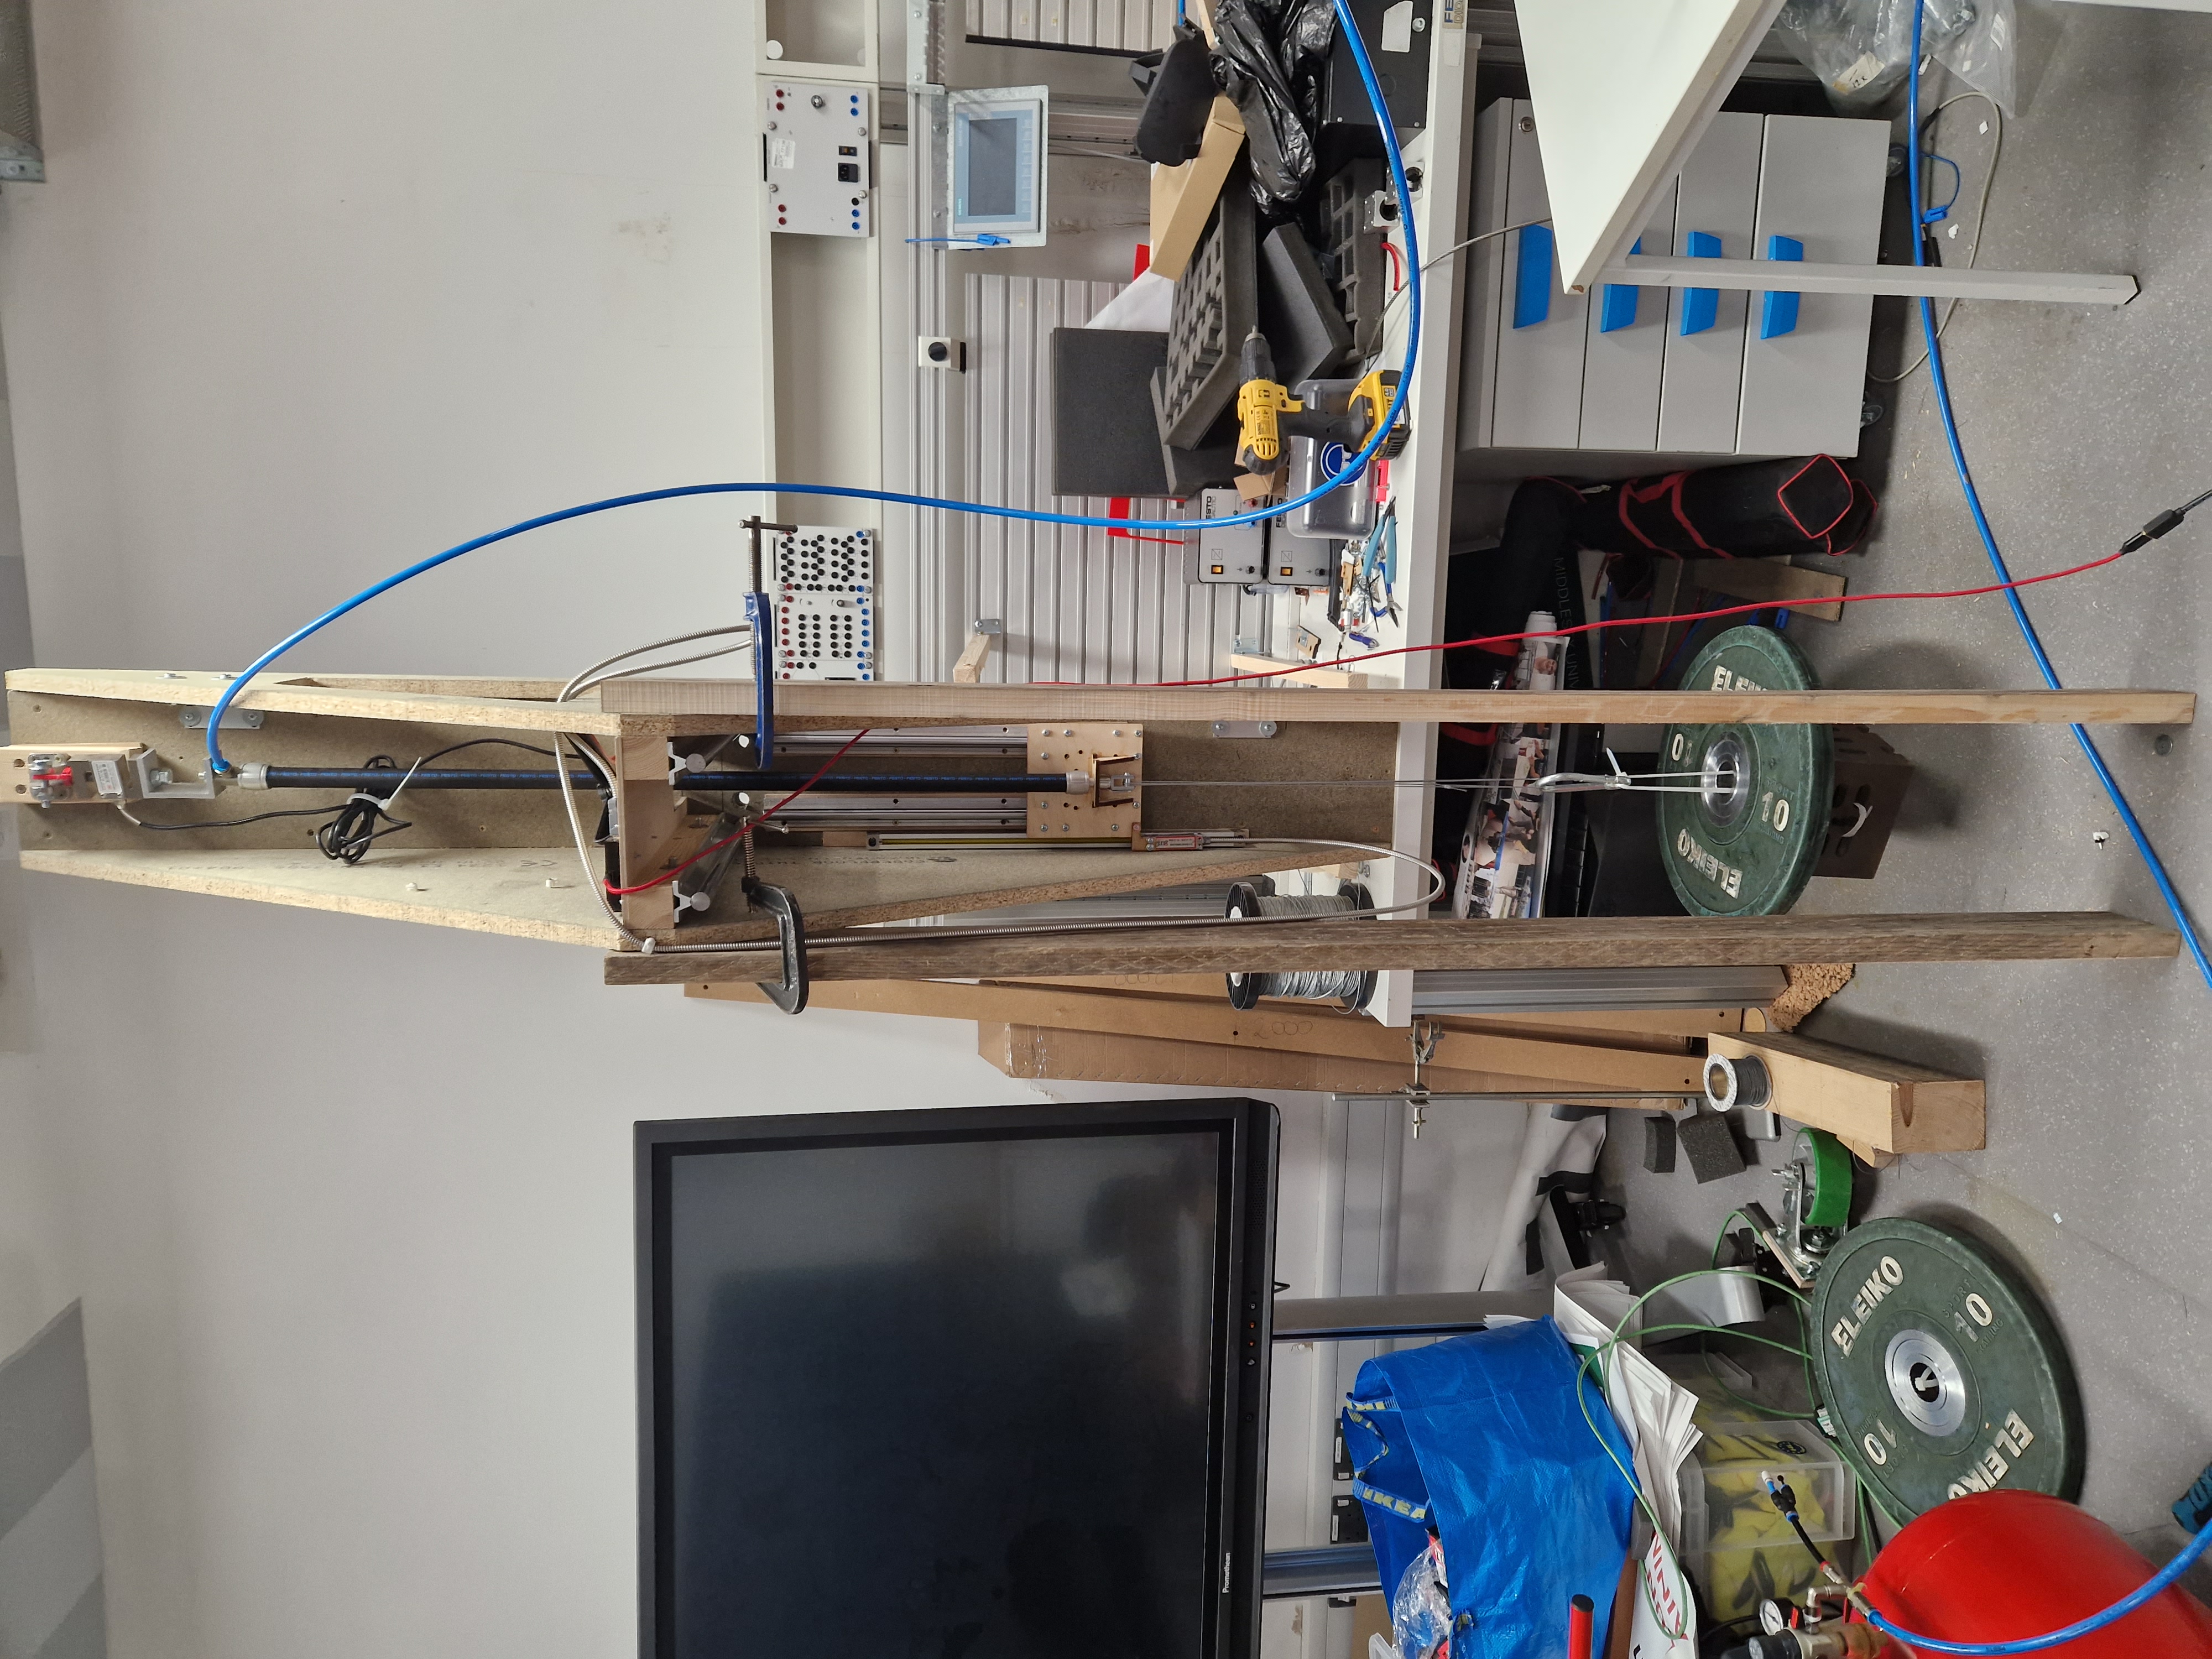
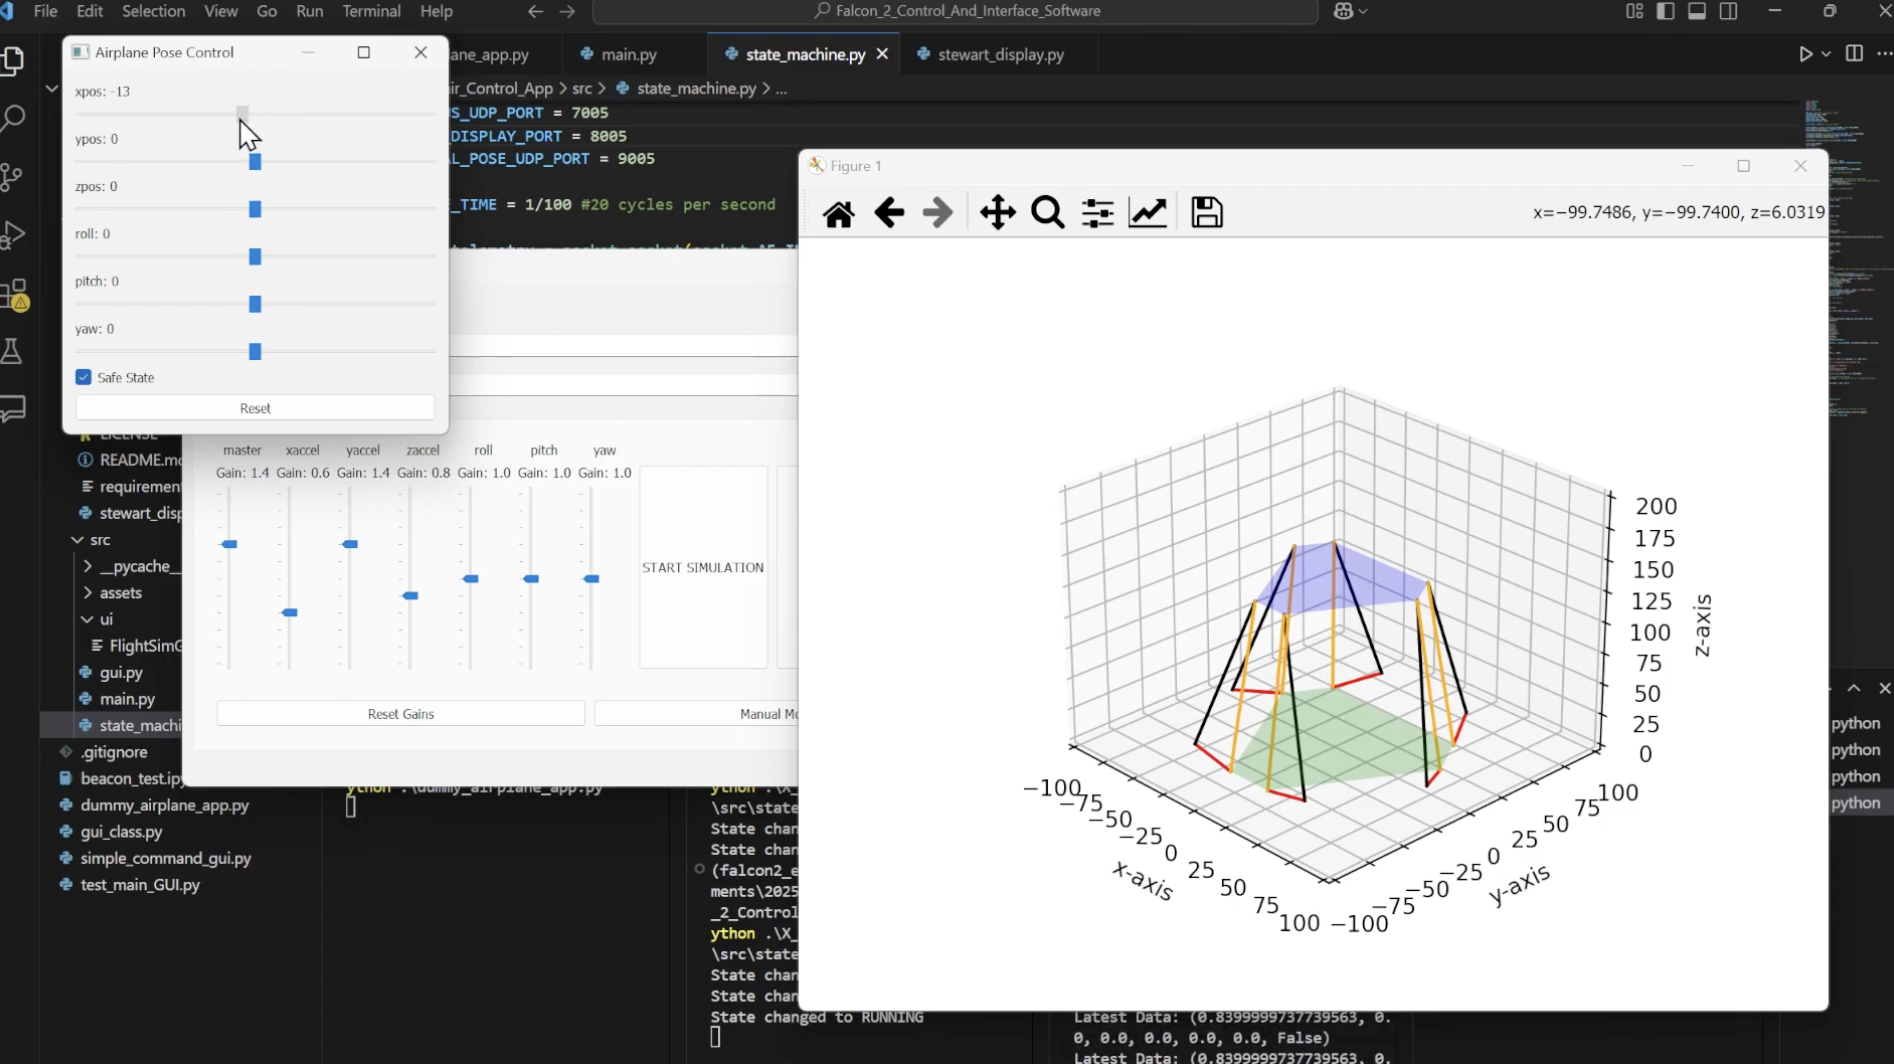
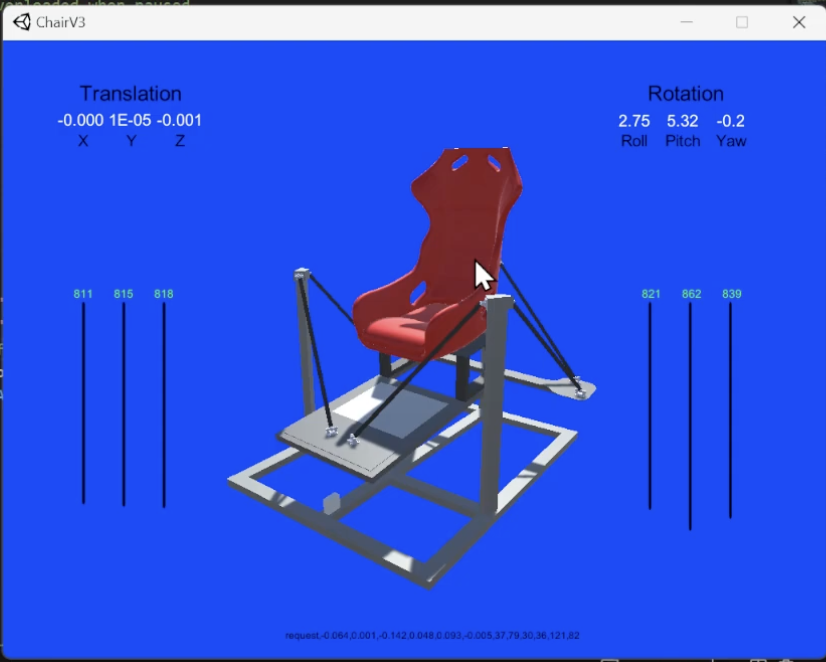
Aaand that’s how initial 12 week journey was kicked off. A lot happened during those weeks and honestly; If you want all the week by week in depth videos, check out my submission blog, presentation, github repo and report I linked on top of this blogpost.

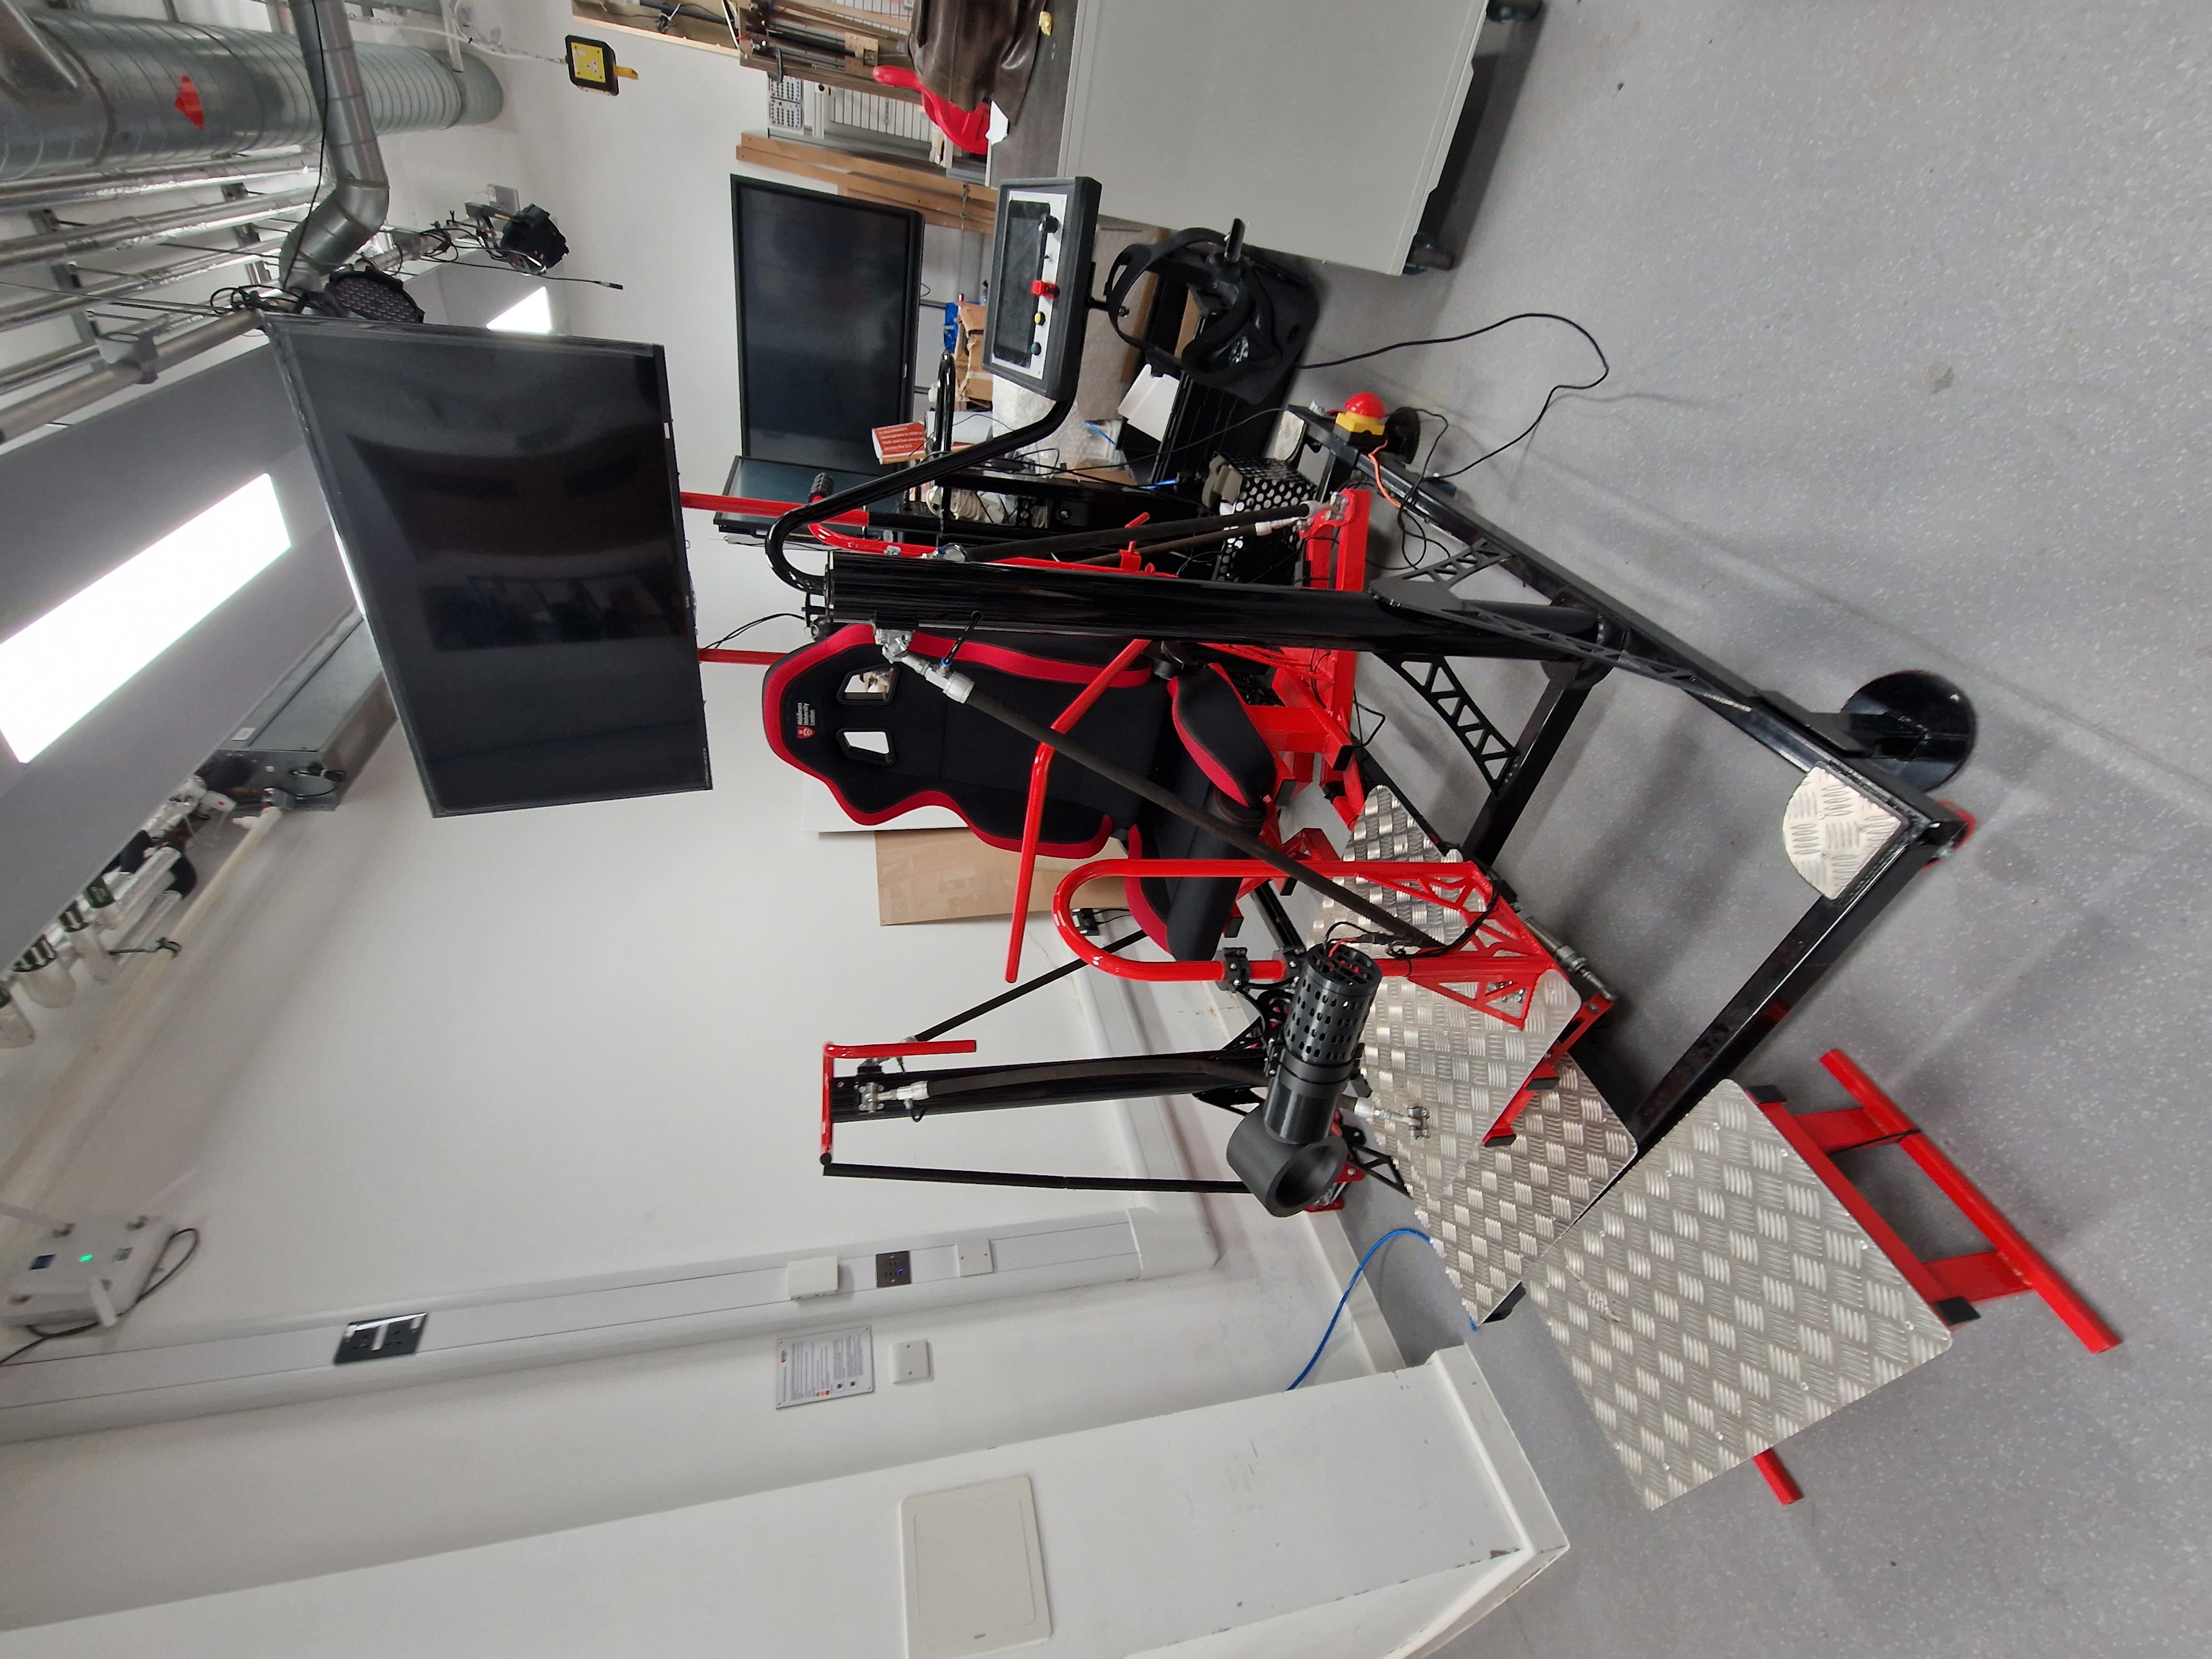
For the remainder of this blog I’ll cover a few project highlights and easter eggs. I’ll then finish off with the platform showcase and final 10 minute presentation I did for my final course day.

On the right is a picture of the muscle calibration rig used throughout the project. This allowed me to take one of the muscles used in the platform and run tests so I could map which air pressures resulted in which contractions depending if it went up or down. The rig also allowed me to change the muscle’s load and therefore gain more extensive data on the muscle’s properties.

Before I had access to the physical platform I needed something to test out my code on. This is where I began developing a platform visualizer that would allow me to see my software’s outputs in a clear visual format. The first version was a barebones steward platform visualizer. I used an existing matplotlib visualizer utility in order to make effective use of my limited time.

The second version of the visualizer was a bit fancier. This was essentially a unity game that listened for UDP telemetry messages from my software and used those to display a 3d twin of the actual platform. During this stage we also developed the visualizer as an aid for the operator who would have to ensure the platform operates safely.

Then there was the 3rd and final version of the visualizer for the academic project. The changes were mostly model and visualization tweaks alongside Quality-Of-Life improvements such as keyboard navigation and click orbiting.

This was an image I used in my project to showcase what the software I developed was building towards. If you look closely you’ll notice I used the male_07 model from half life as the human stand-in. The model is otherwise known for being used in a lot of Source Filmaker movies including that one head popping out from toilet meme that plagued 2024.

This picture was taken after I did my final presentation. If you notice I’m wearing the same shirt just without the blazer. Everyone in the course was essentially buzzing around showing each other what we did.

A perfect punctuation to an incredible journey.

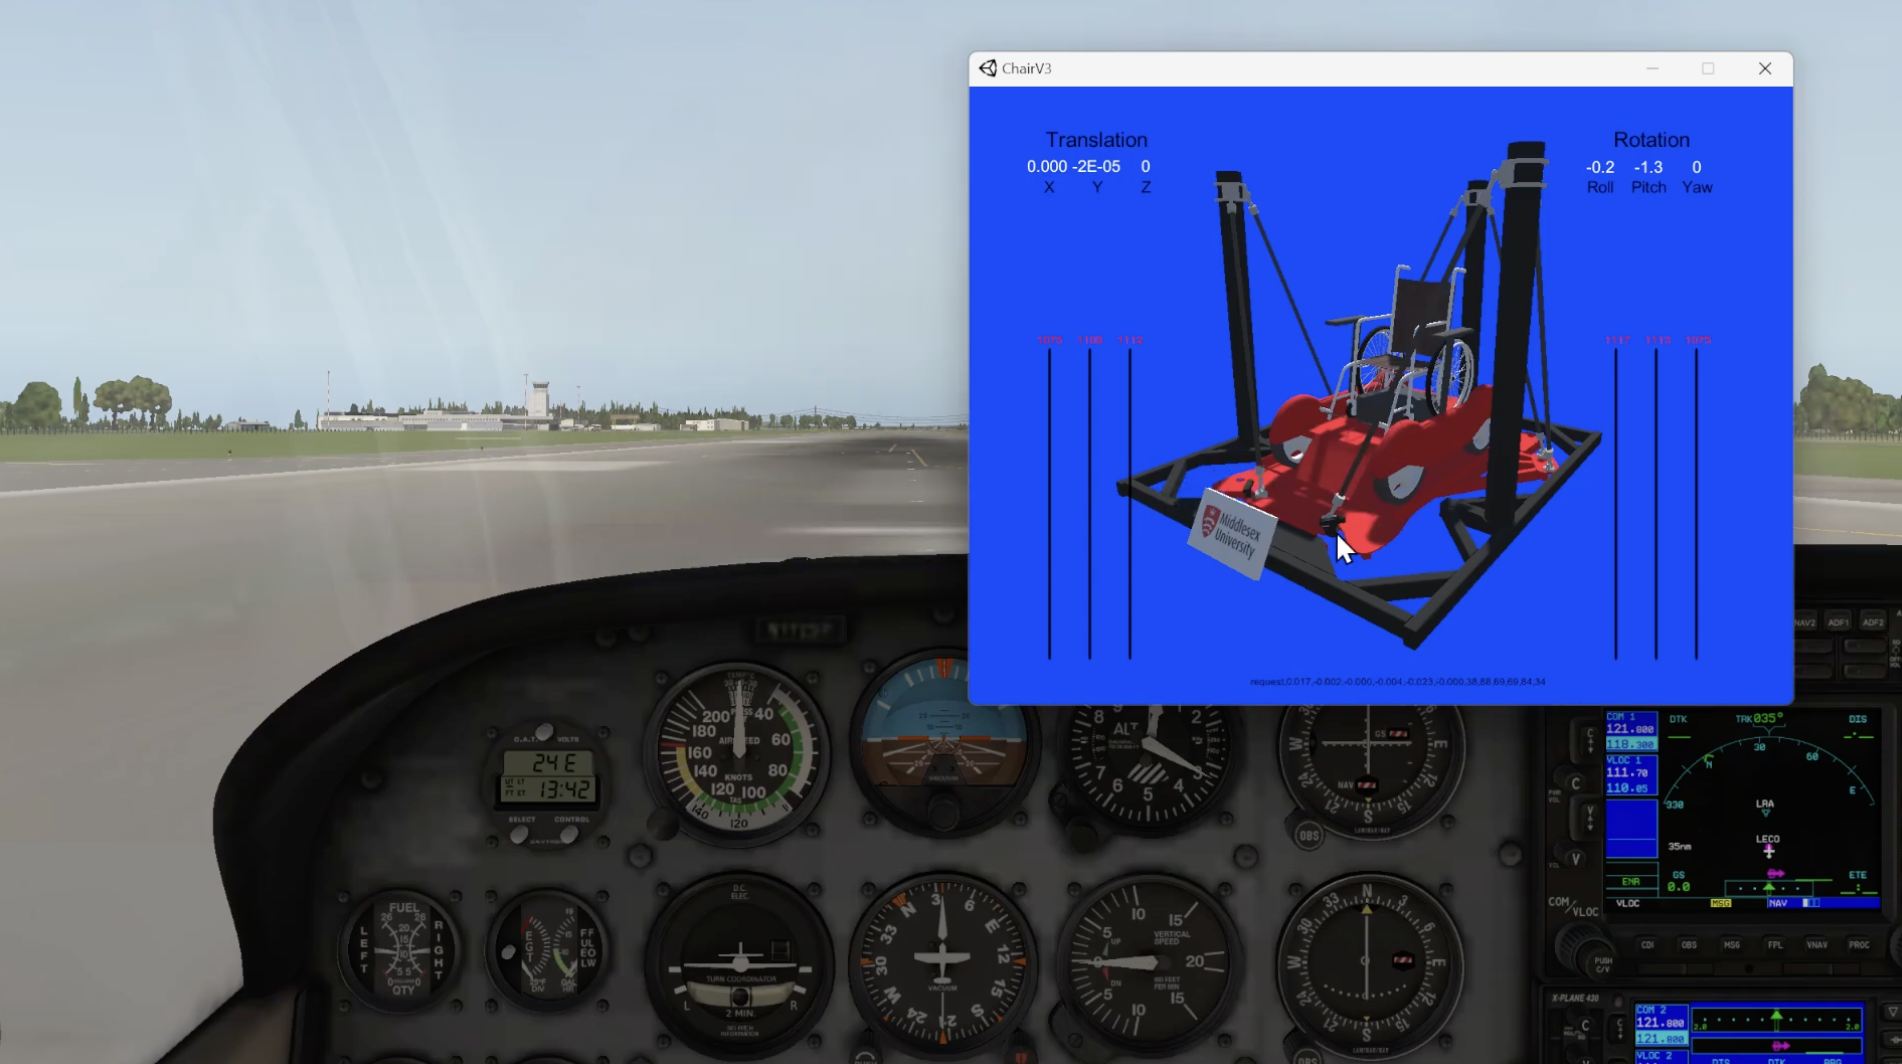
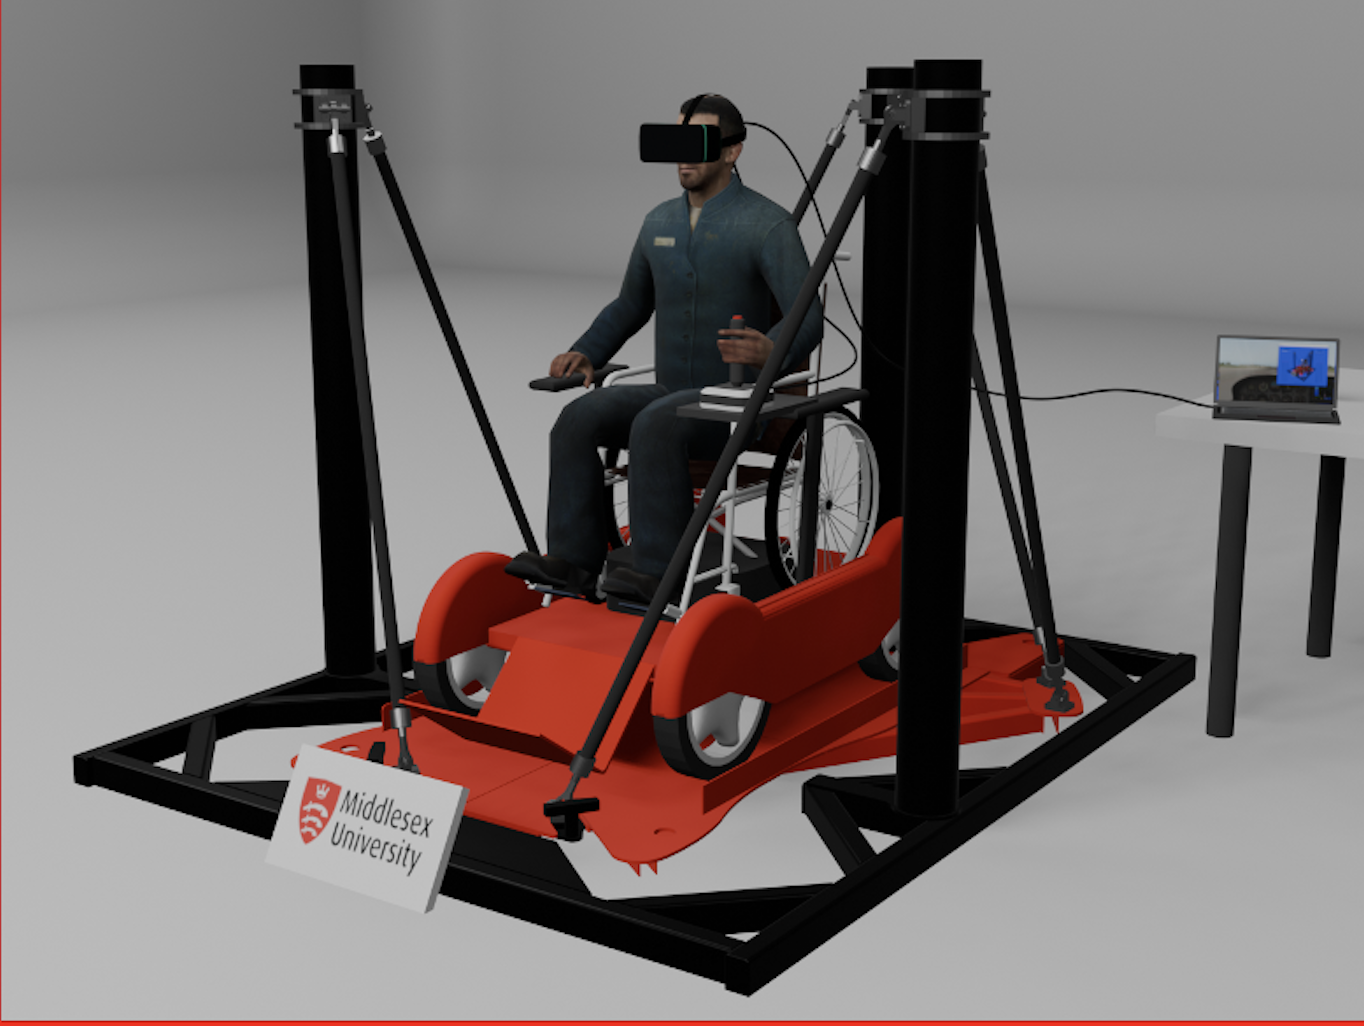
And so that’s the rough highlights. I’ll now present you with a video of me showing the platform in action and the video of my final project presentation.

Enjoy.

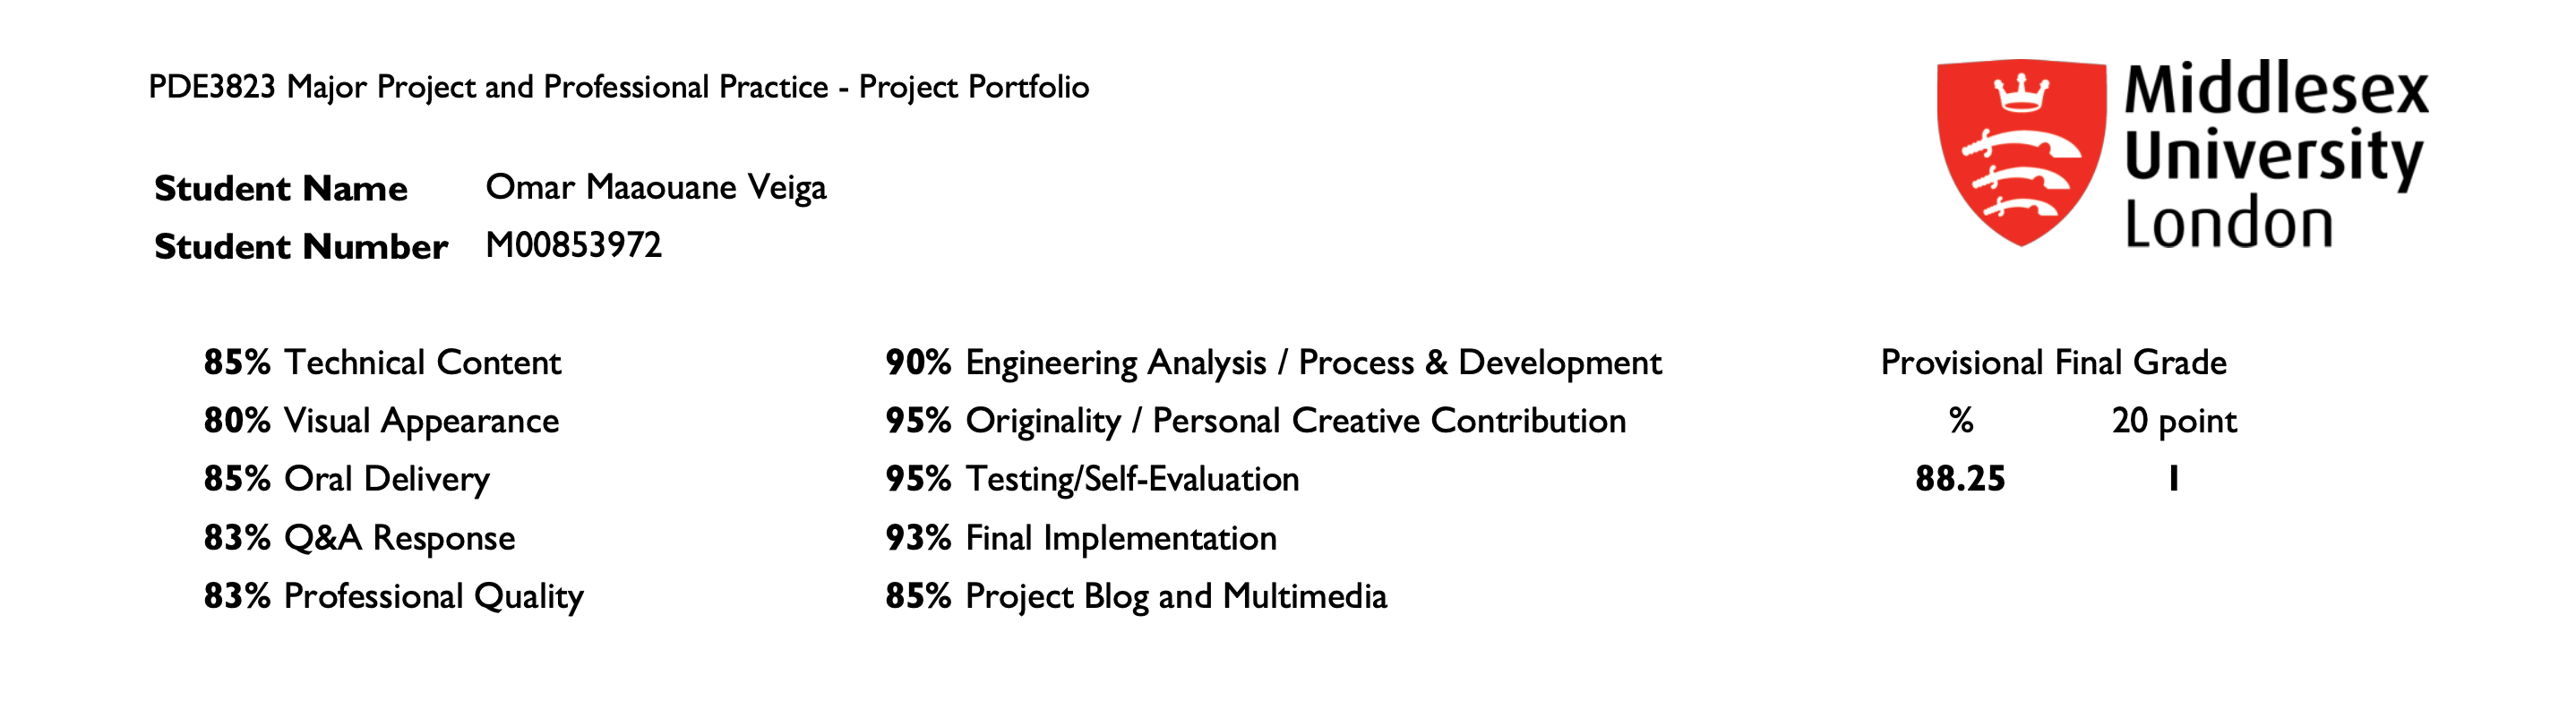
After the presentation, after months of hard work, I achieved 88% on my final year project—the highest in the engineering department of my university.

This earned me eligibility for the IED Excellence Award, presented to the best final year project by the Institute of Design Engineering. I’ll share more about that in a separate post.

Overall, it was a challenging and rewarding experience, and one I’ll always look back on with pride.

Behind the Scenes